

Well, you did it!
You've researched beginner beekeeping until YouTube ran out of videos.
You've figured out that a nail gun is easier than hammering together your boxes with nails or glue. You've overcome your fear of stings and you've sweated through the two layers of shirts under your bee jacket. You've avoided squishing the queen bee through all of your inspections (or did you not find her the whole time?) and you've marveled at how productive she's been. You've taken several hundred pictures (or gigabytes) of your flying girls and you're finally ready to take some HONEY!
If you've declared that your beehive has produced some surplus honey, it is time to harvest some of the golden nectar. Here is a simplified guide to extracting, bottling and storing your honey, and it all begins with preparing your beehive.
1) Honey Frames
Honey is ready when the nectar is sufficiently processed by the bees and it is coated with a layer of wax. These wax cappings protect the honey and seal it from anything that might spoil or contaminate "nature's perfect food." Select frames that are dominantly or completely full of capped honey.
Use any number of these devices or techniques to clear the honey frames or honey super from bees:
* Hive Smoker - temporarily calms bees but may encourage them to cling to cells with honey or nectar.
* Bee Brush - soft bristles can move bees but might require many strokes and can get sticky after much use.
* Blower Motor - moves bees quickly but requires power source and can overpower bees unnecessarily.
* Chemicals - bees react immediately to odours of foreign substances but most backyard beekeepers are not willing to subject their bees to this.
* Bee Escape - either wooden Quebec-style or plastic one-way escapes can help bees escape the honey super on their own. These just take time.
2) Wax Uncapping
Preparing your frames for the extraction process involves removing the wax seals or "cappings" that protect the honey. Use any of these tools to remove wax from both sides of the honey frame:
* Uncapping Forks - various styles of inexpensive, multi-tined tools. Most are light and easy to use but create a manual process and a sticky mess.
* Uncapping Knife - long straight or serrated blades can be used to cut wax cappings but can often cause the wax to bunch and mess up the cells that hold the honey
* Uncapping Rollers - various styles of rolling devices that poke holes in the wax caps but do not always cleanly leave easily extractable frames.
* Electric Knives - use heat to melt part of the wax so that the blade has an easy time of remove the cappings. Super easy to use but relatively expensive.
* Heat Gun or Paint Stripper - electric devices that softens the cappings and makes remove the wax easy and mess free. This technique still requires some scraping though.
* Mechanical Uncappers - machines can be designed to scrape, cut, flail or melt cappings automatically using a conveyor belt and electrical power but these are expensive and usually made for this single purpose.
Whichever technique suits you best, it is highly advisable to have a container to hold and filter the wax nearby. Plus you will want access to hot water and damp cloths during this process.
3) Honey Extraction
The process of separating honey from wax is sped up with the availability of a honey extractor, sometimes called a "honey spinner". Simply place your uncapped frames in the basket of the extractor and begin to spin the frames. Honey will be forced out to the walls of the drum/barrel and will collect at the bottom of the extractor. At the base of the extractor should be a valve, spigot or tap for releasing the honey into a bucket or pail.
These items may be used in place of or in conjunction with a honey extractor:
* Honey Extractors are powered by hand-crank or motorized - both significantly reduce the time required to collect honey from honey frames.
* Filter Cloth - fine mesh fabric for catching wax bits that might be stuck in the thick honey
* Strainer or Sieve - often made of stainless steel and usually comes with a fine and coarse option.
* Daily Extractor Rental - makes an extractor available per day without the need to store it in the off-season.
4) Bottling Honey
Once honey is extracted from honey frames or crushed out of the beeswax (if using foundationless frames), begin straining or filtering to remove any stray bits of wax or other debris. This gravity-fed clarification process should produce a relatively clear, liquid honey you can be proud of. And at any point, you may use a Refractometer (manual or digital) to test the water content of your honey.
Next, choose from the following containers for storage, sales or giveaways:
* Glass - different styles of jars that often come in 12s or 24s. Might come with metal or plastic lids. This option provides clean, sterilized, beautifully displayed long term storage and display.
* Plastic - various sizes and shapes of pails or buckets that come with lids, which might be tamper proof (ensures first time usage). This option offers food-grade level storage in inexpensive, easy-to-fill, stackable containers.
* Specialty Plastic - occasionally, honey dispensers that are unique can be made available or requested for a custom order. Molded miniature bears with plastic lids, or plastic tubs with honey gates, may be very useful at certain times of year.
* Metal - large capacity tanks that are lidded and come with a valve. Designed for long term storage, easy dispensing and higher quantities of honey, these flashy tanks are very desirable for the veteran beekeeper.
5) Honey Processing
Honey that is collected from wax-capped frames is perfectly good to eat and oh, so tasty and nutritious! Some apiaries will go one step further and pasteurize their harvest but in most cases, the increase in honey shelf life and the destruction of certain yeasts are neither wanted nor necessary. To keep your honey liquid, you can use a Brew Belt or hot pad or heat jacket around your tanks.
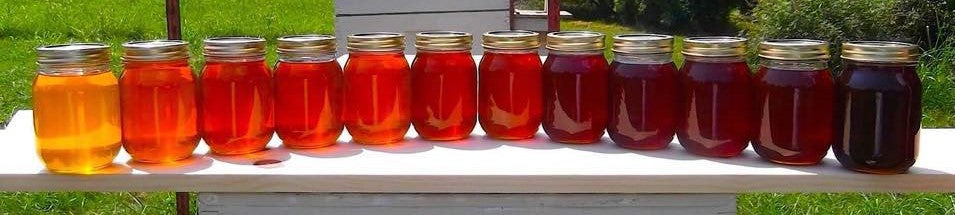
Otherwise, simply enjoy the sweet taste of your honey which likely reflects its unique qualities:
* Geographic location
* Nearby plant life
* Amount of rainfall
* Soil condition
* Harvest time
Remember to choose quality over quantity when judging your honey. And always thank the bees for their foraging, and contributions to your well-earned harvest!